Stroganoff Burgers

Standard
Stroganoff Burgers

As I write this, we’re all at home self-isolating for COVID-19. It’s a stressful time. Trying to work, kids are home and most of us are cooking 3 meals a day. Don’t forget sanitizing your house all the time too! So a quick dinner is something we are all looking for. I came out of my long break to share some recipes while we’re all at home trying to come up with something new to make for dinner.

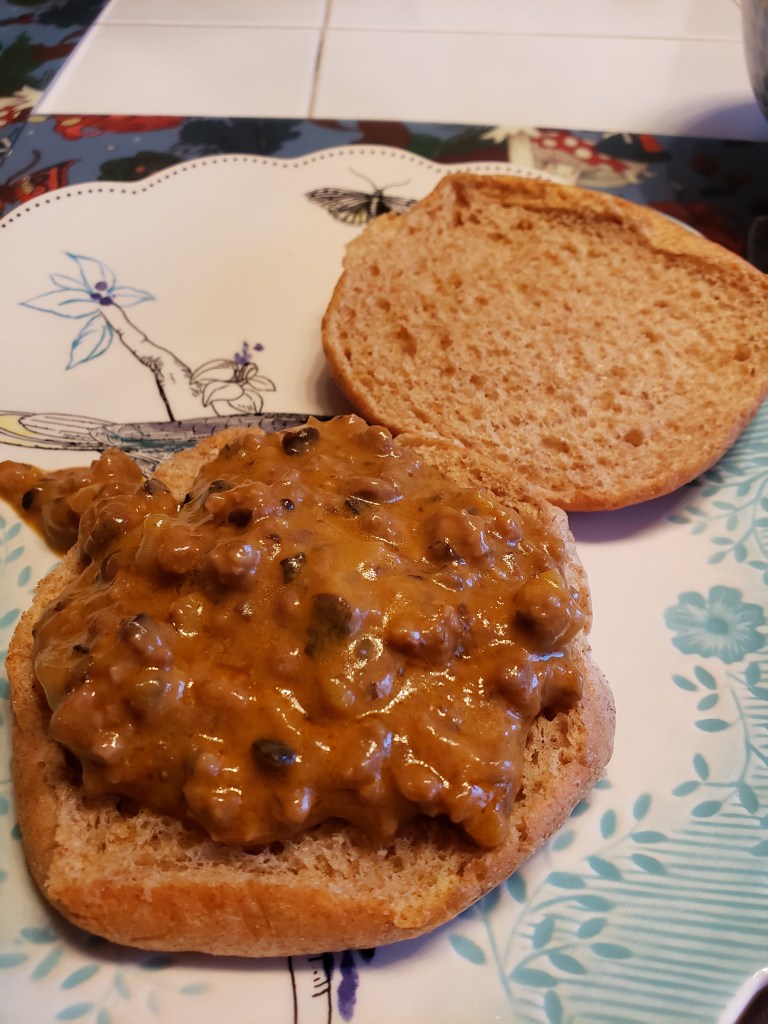
Stroganoff burgers – yummy, easy, everyone likes them

Enter Stroganoff Burgers. My mom made these a ton when we were kids. They are a hamburger-meat-based meal served on half buns. Or bread if that is what you have. The ingredients all store for a long time and you can freeze the meat mixture once you mix it up, should you have any leftovers. The recipe lends itself to making a double batch, so I normally make 2 batches and freeze one. It is also the meal I bring to new parents or anyone else who needs a meal brought to them. We just had these before the quarantine started and I had some leftover buns, so I thawed a little bit and took these pictures.

The taste is very comfort food-ish. My son calls them “snuggle burgers” if that is any clue. My sister hates olives, miracle whip and is not a fan of tomato soup, but she loves these too. They are a crowdpleaser.

Here is the super easy recipe:

Stroganoff Burgers

This is a single recipe, I recommend doubling. Freeze the rest if there is any.

1 pound ground beef
½ pound (8 oz) cheddar cheese
½ can tomato soup
½ c miracle whip
1 small can chopped olives
1 small onion, chopped
salt
hamburger buns

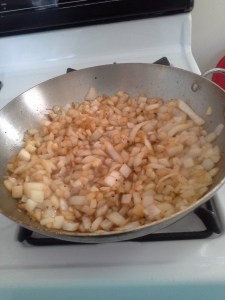
Brown the meat and onions together.  Drain.  In a large bowl, mix everything together.  Put hamburger bun halves on a cookie sheet. Toast them if you feel like it.  Put a scoop of the mixture on each.  Broil until hot and bun looks toasted on the edge.  (If reheating, heat up the meat a little bit first, then broil, or don’t.)

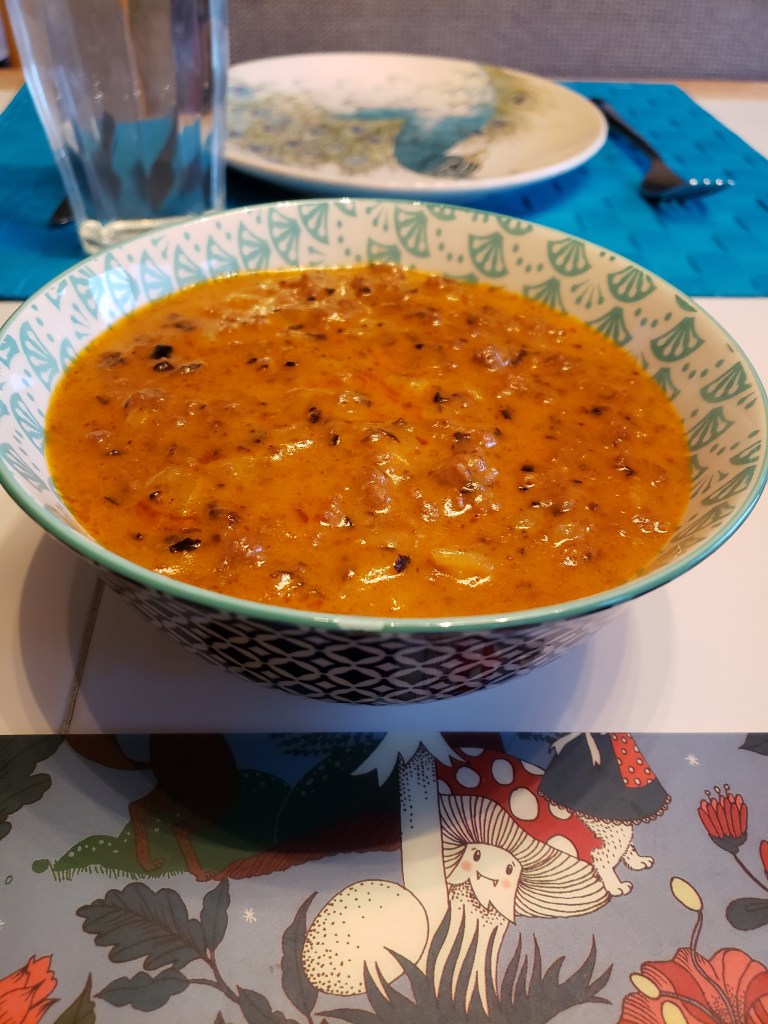
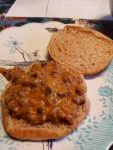
The heated up mixture
Advertisement

Fried Ice Cream For A Crowd

Standard

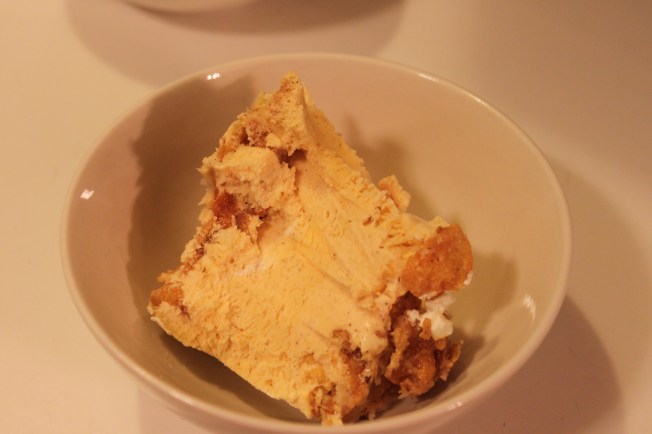
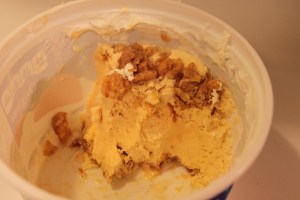
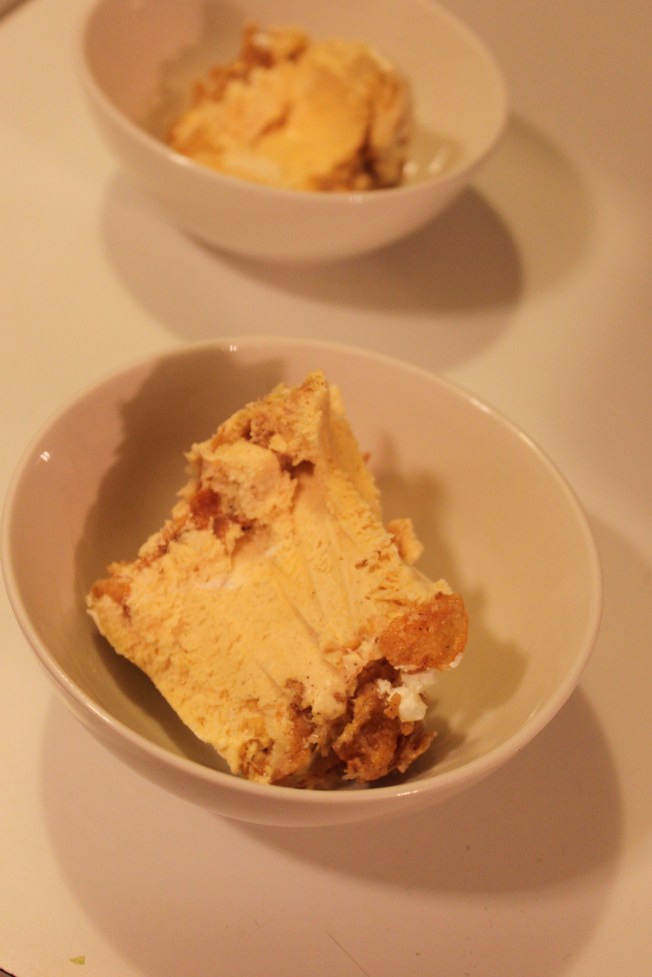
Fried ice cream - layers of sweet, fried Corn Flakes and cinnamon-Cool-Whip ice cream

Fried ice cream – layers of sweet, fried Corn Flakes and cinnamon-Cool-Whip ice cream

I am still here!  I have had to take a break between selling our house and being pregnant, but I’m back!

The recipe I have today is totally worth the wait! Fried ice cream is a fantastic mix of vanilla ice cream mixed with Cool Whip and cinnamon layered with a sweet, fried Corn Flake mixture. Together, they create perfection.  This recipe came to me through a friend of a friend who brought this to a party.  It is soooooooooooo yum!!!!!

The larger version uses a bucket of ice cream

The larger version uses a bucket of ice cream

This recipe you make ahead for a crowd, making it ideal for parties.  And I also figured out how to scale it down for a more manageable quantity.   I brought the huge version to a chili cook-off and it was almost all gone by the end of the night.  Then I made the smaller version for a dinner party (5 adults, 2 kids) and there was none left.  It is popular.  And regardless of which one you go with, it really doesn’t take too much to make it.  You spend more time waiting for the ice cream to get melty than anything else.

The party-sized version uses a big bucket of ice cream.  The upside is that if you are planning on taking this to a party and are torn about leaving the rest of it for your hostess and keeping some for yourself, you get to do both!  The final product takes up 1 ice cream bucket plus 1 cool whip container.  So everyone wins!

The smaller version uses a 1.5 quart container of ice cream, which you can put into a ton of different containers around your kitchen.  Just make sure they are freezer-safe.

The smaller version uses a regular-sized ice cream

The smaller version uses a regular-sized ice cream

Here are the quantities:

Party-sized
1 c butter (2 sticks)
2 c sugar
8 c Corn Flakes
1 gallon of vanilla ice cream, thawed to a workable consistency.  The big one from your childhood.
20 oz Cool Whip, thawed (that is one big and one small container)
1 T cinnamon

Smaller-sized
6 T butter (3/4 stick)
1/2 c sugar
3-1/2 c Corn Flakes
1.5 quart of vanilla ice cream, thawed to a workable consistency.  Go for the one with real vanilla in it
8 oz Cool Whip, thawed
1 tsp cinnamon

Directions:

Thaw the ice cream and cool whip ahead of time.  You need to be able to get a mixer in there.

Melt the butter in a saute pan over medium heat.  Mix in the sugar to combine and then add in the corn flakes.  When the corn flakes start to look a little darker, turn the heat off and continue to stir them occasionally while they cool.

While the Corn Flakes cool a little bit (and don’t stress over how much, a few minutes is fine), work on the ice cream.

Be sure to put the extra in your Cool Whip container for some to enjoy after the party

Be sure to put the extra in your Cool Whip container for some to enjoy after the party

Party-Sized directions:
If you are doing the party-sized version, you’ll want to get a huge bowl and split the ice cream between the original container and the big bowl.  I used an enormous salad bowl.  Eyeball about the right ratios of Cool Whip and cinnamon into each container.  Again, no stressing over this.  Just guess.  Using a mixer, mix up each one until combined.

Layer the Corn Flakes and the ice cream mixture in the ice cream bucket.  This might mean dumping everything in your other bowl for a minute.  I do about 3 layers of Corn Flakes in one bucket, if that helps. And try to end with Corn Flakes so people at the party know it isn’t just ice cream.  But do what feels best for you. With the remaining Corn Flakes and ice cream, layer them in one of the Cool Whip containers.  Put everything in the freezer overnight.  Take the big one to the party and know you have the small one at home for you.

Smaller-sized directions:
In a large mixing bowl, add ice cream, Cool Whip and cinnamon.  Using a mixer, combine well.

In a freezer-safe bowl or dish, layer the Corn Flakes and ice cream.  I end with Corn Flakes so it looks nice.  Cover and put in the freezer overnight.


You will be amazed at how quickly this disappears!

You will be amazed at how quickly this disappears!

My Mom’s Thanksgiving Stuffing

Standard

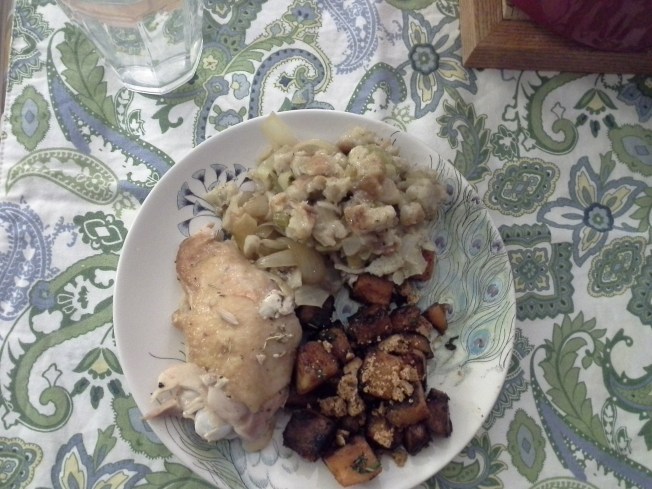
Stuffing with roasted chicken and squash

Stuffing with roasted chicken and squash

I know, I know, I’m a little late here.  I actually took notes this year on my mom’s stuffing and am getting this on the internet before I forget.  Her stuffing isn’t crazy or wild or terribly gourmet.  But it is delicious, amazing, traditional and worthy of fighting over.  Every year someone says we should mix up our usual recipes and try something new, but yet, no matter what changes on the table, this stuffing is there.  Even edging out whatever the latest “gourmet” stuffing might be tried out.

You can make it 100% vegetarian, or you can go a little more traditional by using turkey giblets.  I’m adding them in below separate from the recipe, so just keep an eye out for that.

I also made this recipe on a random week night.  It was insanely easy and would be perfect for company since you could get it ready the day before or morning of and just refrigerate it.  And because let’s face it, who will ever be disappointed that  you served homemade stuffing?!

My Mom’s Thanksgiving Stuffing

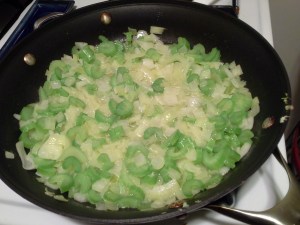
The onion-celery-buttery goodness.  You don't want to brown them, just make them soft.

The onion-celery-buttery goodness. You don’t want to brown them, just make them soft.

Prepared giblets*, optional 1 stick of butter (or vegan replacement if wanted)
1 medium onion, diced
3-4 celery stalks
1 bag Pepperidge Farm Cubed Herb Seasoned Stuffing Mix (I prefer cubed -in the bag with red lettering, but the tradional, non-cubed one with blue trim works just as well)
1/2 c milk
Most of a 32oz tetrapak chicken stock (use vegetable stock if making vegetarian)

Preheat oven to 350. Prepare the giblets if you are using them. Spray a large casserole pan with non-stick spray.

Melt butter in a large saute/frying pan.  Add in the onion and celery and cook until the veggies are nice and soft.  Mix the onion and celery in a large bowl with the stuffing mix.  Add in a splash of milk (if you don’t feel like measuring but throwing caution to the wind – go for it).  Add in about half of the chicken broth and mix very well.  If the bread is still dry, slowly add more broth and mix until the whole thing is nice and moist.  But there shouldn’t be liquid sitting in the bottom of the bowl.

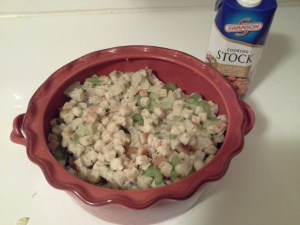
The stuffing right before it goes in the oven - moist but not soaking wet.

The stuffing right before it goes in the oven – moist but not soaking wet.

Transfer to the prepared pan.  If you want to make this ahead of time, get to here, cover it with foil and set aside until you’re going to make it.  If you do this, you may want to splash some more broth on it before adding to the oven because it will dry out a bit as it sits there.

Cover with foil tightly.  Bake for 45 min or until nice and hot.  Serve while warm.


Preparing giblets

So the giblets are the extra turkey bits you get in your turkey.  If you’ve ever made a turkey, when the moment comes to reach inside, you sometimes are unpleasantly surprised with a bag of goodies.  Those goodies are the giblets. Sometimes the neck is in there too.  Here’s what you do with them.

1 set of giblets
Chicken broth

Put the giblets in a small pot just big enough to hold them.  Cover with chicken broth.  Bring to a boil, then reduce to a simmer for at least 20 min, or until they seem to be cooked through.  Drain, reserving the broth to use in the stuffing (because it will be the tastiest broth).  Then put the giblets in a food processor or finely cut them up.  If you have the neck, see if you can pull anything off of it, but don’t feel bad if you just chuck that.  The liver and whatnots are the best flavoring.

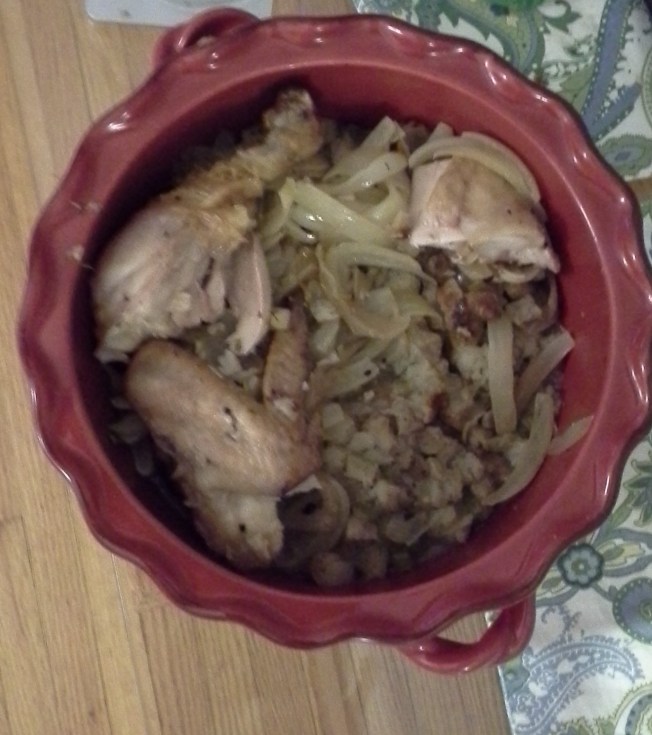
Leftovers reheated the next night - stuffing and chicken together. Just as delicious.  (And it is on a clear table, not the floor)

Leftovers reheated the next night – stuffing and chicken together. Just as delicious. (And it is on a clear table, not the floor)

Sweet and Spicy Pecans

Standard

These spiced nuts disappear like magic at parties

These spiced nuts disappear like magic at parties

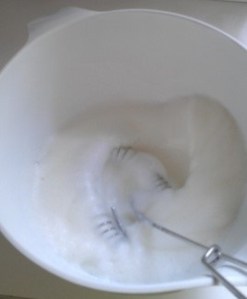
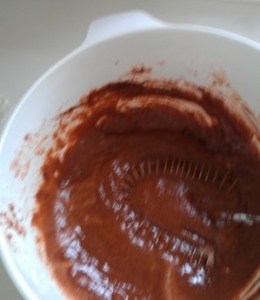
Whip the egg whites to be nice and fluffy

Whip the egg whites to be nice and fluffy

My mom first found this one.  If you have been to a party at my house, you have probably had these.  I love them.  They are the perfect sweet/spicy mix, they use no oil to make them (just egg whites!!), can be made ahead of time and store well.  Great for this time of year when you need to bring something with you to a party.  And they disappear immediately.  Maybe because they are as addictive as crack.  I always double the recipe.  Always.

1 large egg white (2 tablespoons)
½ c sugar
2 T sweet paprika
2 tsp Worcestershire sauce
1 to 2 tsp cayenne pepper, to taste (I go light on this one)
½ tsp kosher salt
2 c raw pecan halves

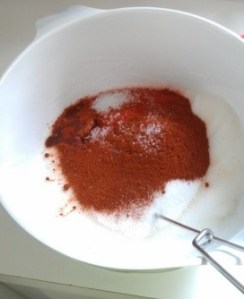
Add spices and seasonings

Add spices and seasonings

Preheat oven to 250*.  Line a baking sheet with parchment paper.

Place the egg white in a large stainless steel

Whip up to keep eggs somewhat fluffy

Whip up to keep eggs somewhat fluffy

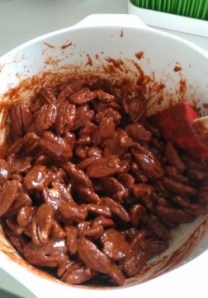
bowl and whisk until frothy.  Whisk in the sugar, paprika, Worcestershire, cayenne and salt.  Add the pecans and toss until completely coated.

Transfer the pecans to the prepared sheet and arrange in a single layer.  Place in the oven & cook, stirring every 15 minutes, until lightly colored and dried out, about 1-1.25 hours.

Remove from the over, while it is still very

Stir in nuts

Stir in nuts

warm, loosen the nuts with a metal spatula (if not, when it is cool, you’ll have to crack them apart), and set aside to cool before serving.  Picture from after baking.

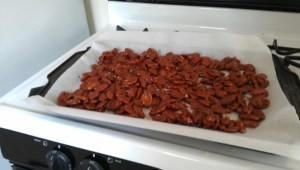
Before they go in the oven

Before they go in the oven

Prep pictures shows a double-batch.  I can’t recommend strongly enough doubling the recipe.

Single batch makes 2 cups.

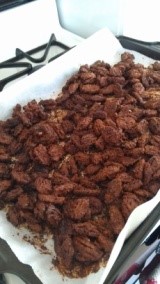
After they come out of the oven

After they come out of the oven


Chicken Broccoli Casserole

Standard

Chicken Broccoli Casserole is classic Midwestern cooking

Chicken Broccoli Casserole is classic Midwestern cooking

Chicken broccoli casserole only has easy ingredients

Chicken broccoli casserole only has easy ingredients

This is a recipe my mom used to make ALL THE TIME when I was a kid.  It is a great casserole that hits all of my favorite casserole features – one-dish meal, veggies and meat all in one, cream of chicken soup and cheese.  Seriously, could you ask for more?  It is great on a cold day to warm you up from the inside and make you happy.

My mom always served it with crescent rolls, a rare treat for us.  I still always grab a tube when I make this.  And if you want to be totally Wisconsin, have some bars for dessert.  7-layer bars would do nicely.

In this day and age of easy prep, you can get pre-cooked chicken in the freezer section if you want to skip over that.  I see no reason why that would be any different than baking up some chicken the night before you make it.

And if you are from Minnesota, please read the title of this dish as Chicken Broccoli Hotdish.

Layer the chicken, then broccoli, then the sauce and then cheese

Layer the chicken, then broccoli, then the sauce and then cheese

3-4 chicken breasts, cooked* and cut up
1 bag frozen broccoli, thawed
2 cans cream of chicken soup
1 big scoop of mayonnaise
1/2 tsp curry
1 tsp lemon juice
cheddar cheese

*Cook chicken at 350 for 30 min (can be done the night before).  I usually just leave it completely plain or sprinkle a little curry on it.  It’s going in a casserole, this is not a time to be fancy.  Cut up.

Place chicken in the bottom of a greased casserole dish.  Sprinkle broccoli over chicken.  In a separate bowl, mix soup, mayo, curry and lemon juice.  Spoon over broccoli.  Top with cheddar.  Bake at 350 for 45 min or until bubbly.

Before it goes in the oven - all layered goodness

Before it goes in the oven – all layered goodness

Sorry that I have shadows of my head in all the pictures.

Borscht

Standard

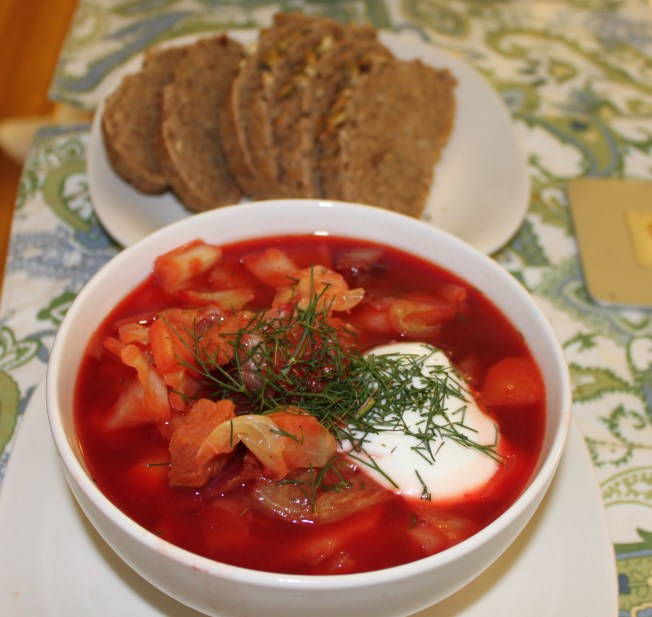
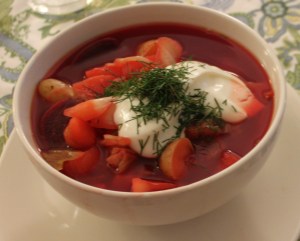
Borscht with sour cream and dill served with hearty bread

Borscht with sour cream and dill served with hearty bread

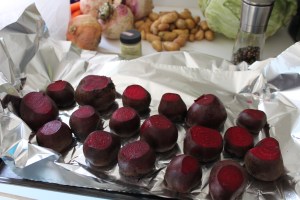
Beets ready for roasting.  (Make some extra because they are like candy!!)

Beets ready for roasting. (Make some extra because they are like candy!!)

Eating borscht brings me back to Dubna, Russia 20 years ago (Yikes!).  I lived there for a summer and then was studying in Moscow for the fall semester.  I came back to Dubna to visit my host family in late September.  It was the first snow with all the magic that first day of snow brings.  My host brother met me at the train station in the largest ushanka (furry hat with flaps) I had ever seen and brought me home to where Mama had made borscht.  It was the perfect dish to go with the big, fluffy, Russian snowflakes.  If you can pull off some hearty bread with it, you’ll be eating this in total style.

To be honest, I don’t really use a recipe when I make this.   I more pick up the ingredients at the grocery store and then start chopping.  As my pot gets fuller, I stop chopping.  You can make this vegetarian by leaving out the ham.  Feel free to make changes to the veggies to suit your tastes or what is available.  The beets and cabbage are the most critical parts for the right feel.


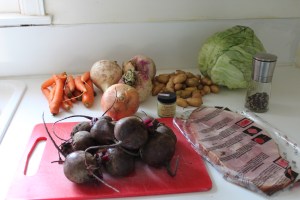
Here's what you need.  Feel free to eyeball the ingredients to be what you like

Here’s what you need. Feel free to eyeball the ingredients to be what you like

The pictures show a double recipe.

1 bunch of beets
1-2 T olive oil
1 large onion
4 medium carrots
1-2 parsnips or turnips or other root vegetable that looks appealing (or skip if you aren’t into that)
Salt and pepper
1 tsp Tsardust Memories by Penzeys (If you don’t happen to have this obscure spice see below)
6-8 c chicken stock
2-3 potatoes (or about their equivalent of smaller ones), I prefer Yukon Gold or fingerlings
1 ham steak, a thick cut of ham usually in the meat section next to the whole hams, about 5-10 oz
1 small cabbage
Sour cream and dill for garnish (not optional)
*  Tsardust spice is made up of salt, garlic powder, cinnamon, pepper, nutmeg and marjoram.  To recreate it, mix together as many of those spices as you have, going heavier on the garlic and cinnamon to get to about 1 tsp.

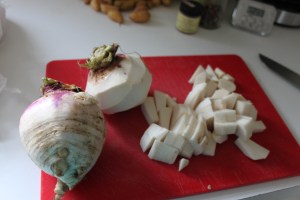
Turnips are easy to work with.  Just peel off the waxy skin and chop!

Turnips are easy to work with. Just peel off the waxy skin and chop!

Preheat the oven to 400.  Wash and trim the tops and bottoms off of the beets.  Put a layer of aluminum foil on a baking sheet.  Put down the beets making sure they are spaced out as much as possible.  Cover with more foil and crimp the edges to seal them in.  Bake for about 1 hour or until you can push a fork into them easily.  Take them out and cool, slip off the peels if you want, but not necessary.

While the beets are cooking, chop up the onion into medium dice.  Heat the oil in a big stock pot and add the onions.  Cut up the carrots (into rounds) and add to the onions.  Cook until they are starting to get tender.  Add in parsnips/turnips, salt, pepper and Tsardust.  Mix them up all up.  Add in the broth and bring to a boil, reduce to a nice simmer for about 15 min.

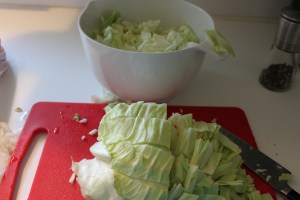
Cutting the cabbage into quarters makes it much easier to tackle

Cutting the cabbage into quarters makes it much easier to tackle

While that cooks, chop up the potatoes into small pieces (picture them on a spoon).  Add to the pot when the timer goes off. Turn the heat up a little so you keep a good simmer going.  Set timer for 15 min.  Meanwhile cut up the ham and beets into same size pieces as the potatoes.  Add them to the pot when the timer goes off.  Cut the cabbage in quarters (starting at the core each time), cut the core out and wash.  Thinly slice the cabbage and add to the pot as you go.  Stop when you feel you have enough cabbage in there (for me about half-3/4 of a medium cabbage in this double recipe).  Simmer until the cabbage cooks and it all comes together.

Don't skimp on the sour cream (fat free is good!) and dill.  The sour cream is critical for creaminess and dill brings tons of flavor

Don’t skimp on the sour cream (fat free is good!) and dill. The sour cream is critical for creaminess and dill brings tons of flavor

Serve with a dollop of sour cream and some dill.  Both are totally necessary for the full taste.  The sour cream transforms the soup into a creamy one and the dill brings a fresh flavor to the soup that is wonderful.

Grandma’s Rhubarb Upside-Down Cake

Standard

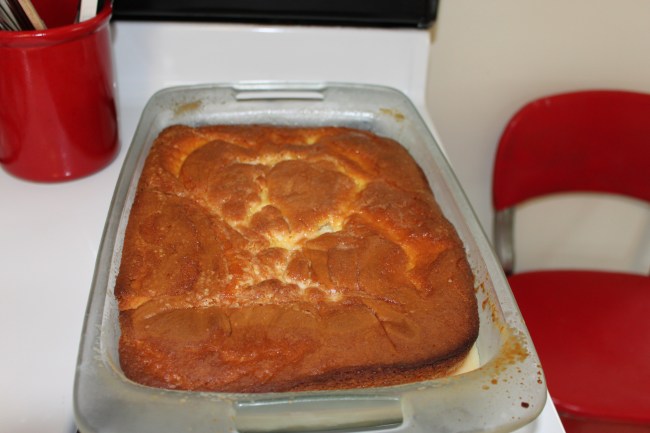
Rhubarb upside down browns on top, but creamy and sweet on the bottom

Rhubarb upside down browns on top, but creamy and sweet on the bottom

Growing up in Wisconsin, I thought that rhubarb was just one of those plants that everyone had in the yard, like grass.  We had a huge rhubarb plant, as did my grandma.  Both my mom and my grandma used to make this cake in the summer to take advantage of the fresh rhubarb.  And then we would cut up and freeze rhubarb in 2c baggies so we could have it all winter.  Everyone loves it.  Everyone.  This is quite possibly the moistest cake ever.  And the other perfect part – it is crazy easy.  It really is in my head as a list of ingredients, not as a recipe at all.

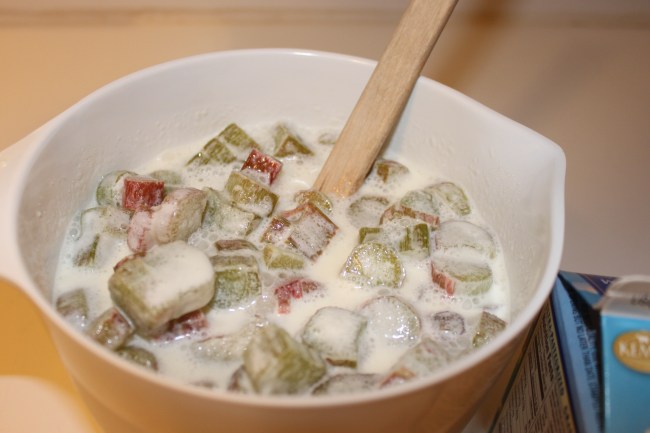
The rhubarb, sugar and cream make a sweet layer that will end up on the bottom of the cake

The rhubarb, sugar and cream make a sweet layer that will end up on the bottom of the cake


I have used it as a go-to for entertaining since it is summery and looks light, although it is rich and very satisfying.  Arvind loves this cake.  And he definitely a chocolate guy.  The first time I made this, I don’t think he walked through the kitchen without taking a few bites.   The poor guy has been traveling for work a lot and we’re visiting friends this weekend, so I decided to pull a little rhubarb out of the freezer to make him this treat.  So, I know it isn’t prime rhubarb season, you still can get a few stalks out of your garden.  And if you have a few extra, cut them up for the middle of the winter as well!

Grandma’s Rhubarb Upside-Down Cake

2 c sliced rhubarb
2 c sugar
2 c heavy cream (the one pint sized container)
1 yellow cake mix

The additional ingredients listed on the yellow cake mix (eggs, oil, water, etc)

Mix the rhubarb, sugar and cream together.  In a separate bowl, mix the cake according to the package.  Pour cake batter into a greased 13 x 9.  Stir up the rhubarb mixture and pour over the batter.  Ease the rhubarb into the corners of batter (it will fall through to the bottom).  Bake according to the package, until done.  I usually have to add 10-15 extra min to get it to be done.  To serve, flip pieces to be rhubarb-side up.

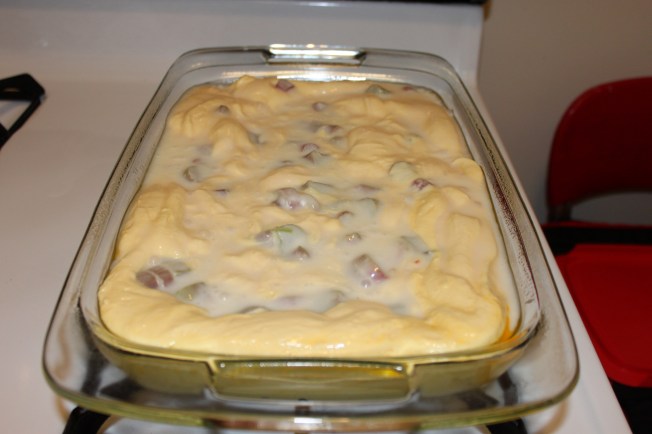
The rhubarb mixture will fall through the cake batter as it cooks.  Just try to make sure the rhubarb spread out throughout the pan

The rhubarb mixture will fall through the cake batter as it cooks. Just try to make sure the rhubarb spread out throughout the pan


Corn! 2 Ways to Enjoy Fresh Corn (That isn’t corn on the cob)

Standard

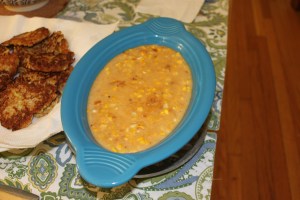
Creamed Corn that is guilt-free!

Creamed Corn that is guilt-free!

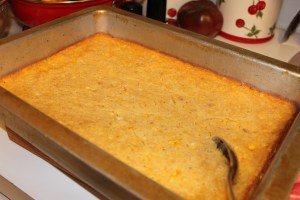
Corn Casserole - all sorts of yumminess

Corn Casserole – all sorts of yumminess

It is corn season.  And like any self-respecting Midwesterner, that means I’m drawn to the large pick-up trucks full of sweet corn stationed on county roads, parking lots and farmers markets.  We’ve had plenty of grilled corn and boiled corn on the cob, but sometimes you want to mix it up.  Or I have overbought in my excitement about yummy corn and realize I need to do something with it while it is still all fresh and juicy.  Here are 2 recipes to use up yummy corn and mix it up a bit.

The first recipe is for creamed corn.  I know you are picturing that little can of creamed corn from your childhood.  This is anything but that.  Think more adult, more flavorful and best of all – nearly fat free!  I whip up a batch of this and use about half for the following casserole recipe.  But Arvind and I fight each other for the last drop of this one!

The second recipe you may already have.  Perhaps written on the back of an envelope or a scrap of paper stuck in with the rest of your recipes. It is the corn casserole you make with the Jiffy cornbread mix.  Super easy!  Almost no measuring involved.  It is juicier than cornbread, but more solid that creamed corn.

If you still have more corn after this, save some for the winter. I grill corn, cut it off the cob and then put it in freezer bags.  In the winter when I’m making something that calls for frozen corn, I have some all ready to go!

If you now have cornbread on the brain, I would recommend this recipe for quite possibly the very best corn bread ever.   Personally, I only make ¼ of the maple butter and serve that on the side.  And I have made it in a 9×9 pan or doubled the recipe and put it in a 13×9 pan.

If you want to see any of the pictures more closely, just click on them.

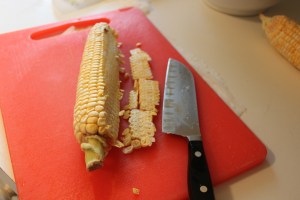
Get a firm hold of the cob and cut off the kernels

Get a firm hold of the cob and cut off the kernels

Creamed Corn
4-5 ears of corn, kernels cut off (see picture for how)
1 teaspoon salt
2 tablespoons sugar
1/2 teaspoon freshly ground black pepper
2 tablespoons butter
2 cans fat-free evaporated milk
¼ c whole wheat flour (all-purpose is OK too)

Cut the corn off the cob.  There are different schools of thought on how to do this.  I find holding the cob flat on a cutting board and cutting along the length of it, then rotating a little and repeating works well.  When I’m done, I go around the corn looking for stray pieces.

Creamed corn as it thickens

Creamed corn as it thickens

Mix the corn, salt, sugar, pepper butter and 1 can of milk in a skillet.  Pour about 1/3-1/2 of the milk in from the second can in as well.  The mix the flour into the remaining milk until it is fairly smooth.  Add that into the corn as well.  Heat over medium-high heat, stirring occasssionally.  When it comes to a boil, stir constantly until it is as thick as you’d like it to be.  Turn off heat and serve or use in the following recipe.

Corn Casserole
2-3 ears of corn corn
2 c creamed corn (see above)
1 (8-ounce) package Jiffy corn muffin mix
8 oz container (1 cup) sour cream
1/2 cup (1 stick) butter, melted

Have at those cobs to get all the corn off of them

Have at those cobs to get all the corn off of them

Preheat the oven to 350. Grease a 13” x 9” pan.  Cut the corn off of the cob.  Mix everything together and put in 13 x 9.  Bake for 45 min until starts to brown on top.

The casserole before it goes in the oven.  (See above when when it is done)

The casserole before it goes in the oven. (See above when when it is done)

Lamb (or Beef!) Tagine with Herbed Couscous

Standard

Lamb tagine with herbed couscous and grilled eggplant

Lamb tagine with herbed couscous and grilled eggplant

Sorry it has been such a long break in writing, but we’re selling our house and I feel like I’ve been banished from my kitchen!  However, I did sneak in to make some lamb tagine recently and took some pictures of it.  Don’t like lamb?  See below for substituting beef!  For you moms who are dealing with hungry kids and no time for cooking, this nice thing about this one is you pop it in the crockpot in the morning and have dinner when you get home from work.  Disclaimer: that does mean some work the night before.

I learned how to make chicken at a Moroccan cooking class at Cooks of Crocus Hill.  It is my go-to for company that I want to impress.  This is its sister – lamb tagine.  The secret is that isn’t all that hard to make and you can do it all ahead.  It is all about cooking it low and slow.  Since lamb takes a long time to cook, I usually get it to the point where it needs to simmer the night before.  I pop it in a crock pot and put it in the fridge until the next morning.   The lamb/beef needs to go all day in the crock pot so it is just fall apart tender.  The bonus is that it gives all the other flavors plenty of time to meld together into the ultimate comfort food.  If you are entertaining, no need to keep running in the kitchen or worry if your guests are late.  This is the most forgiving recipe ever.
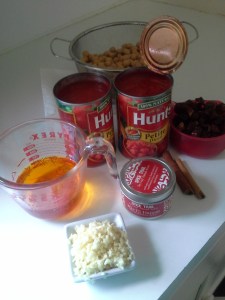
Prepping your ingredients makes it easier

Prepping your ingredients makes it easier

We love lamb, but if that is not your thing, you can substitute in beer.  I would recommend cuts that are meant for stewing since you also want the beef to cook for a good long time.  The main thing you are looking for are tougher cuts of meats that turn tender and delicious with cooking for a long time.  Look for Chuck, Chuck Shoulder, Chuck Roast, Chuck-Eye Roast, Top Chuck, Bottom Round Roast, Bottom Eye Roast, Rump Roast, Eye Round Roast, Top Round, Round Tip Roast, Pot Roast, Stew Meat.  The beautiful thing about these meats is that they are cheaper than fancier cuts.  Also, cut down on your prep time by picking out your package of meat and then bring it up to the meat counter.  They can cut it up for you in a machine in back.  Tell them you want large pieces since they will shrink with all that cooking.

If you are not familiar with tagine flavors, it is a Moroccan method of cooking meat.  Tagine is actually a kind of pot that is shallow with a tall cone with a point on top.  The steam circulates during cooking making the meat tender.  In this recipe, the crockpot fills in nicely.  The flavors are a mix of turmeric, cinnamon, allspice, nutmeg, saffron, ginger and cardamon.  The dish is a mix of meat, tomatoes, chickpeas and dried apricots, so there is a great mix of textures as well.  You can swap in or out anything into it.  Sweet potatoes are good and any other veg that can handle long-term cooking.

I find that prepping this one is helpful.  It tends to go more quickly than you think, so having the onions, garlic and fruit cut up and ready to go makes life easier.

Serve it with the herbed couscous, the recipe follows.

 Lamb (or Beef) Tagine
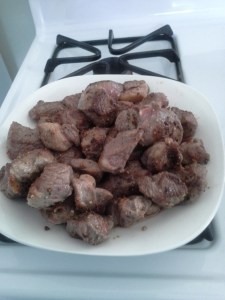
Brown the lamb in small batches so you get a nice crust on the meat

Brown the lamb in small batches so you get a nice crust on the meat

Vegetable or olive oil for sautéing
Half of boneless leg of lamb, about 2 pounds, or similar cut*, large cubes, or 2 pounds (approximately) of beef – see note above for appropriate cuts.
Salt and pepper
1 large onion, chopped
12 cloves garlic, minced
2 T Ras el Hanout**
2 large pinch of saffron soaked in 1/2 c warm water
2 cinnamon stick
2- 15 oz can of diced tomatoes
2- 15 oz can of chickpeas
1 c apricots cut into strips (any dried fruit works, just go with what you like)

* I get our lamb at Costco.  A boneless leg of lamb is huge, so I cut it in half and freeze it.  Cut it into larger cubes – about 2″ cubes is great.
*  Ras el Hanout is a Moroccan spice.  The recipe follows or you can buy it online.  I like Saffron Restaurant’s version of it.  It is a Moroccan restaurant in Minneapolis that sells their spices online (although be sure to get their Ras el Hanout and not the tagine spice.  The Ras el Hanout is better).  Williams Sonoma also makes one, but they have redone theirs since I last bought it.  Premade ones are expensive, but you generally get a lot in a package and you’ll
Use the onions (and their juices) to pull up the tasty bits attached to the pan

Use the onions (and their juices) to pull up the tasty bits attached to the pan

spend more buying all the ingredients to make it yourself if you don’t have most of it on hand already.  For those of you with big spice racks, make it from what you’ve got!

Cut and dry the meat with paper towels.  You want to make sure the lamb is as dry as possible.  Season with salt and pepper (I usually just season the side that is exposed to me, then make sure that gets put down in the pan, then season the other side once the meat is already cooking).

Heat 2 T of oil over medium-high heat in a heavy frying or braising pan, ideally avoid non-stick pans since it is hard to get a nice crust with those.  “Sticky” pans are much better for this.  Add lamb to the pan spaced out so the pieces don’t touch each other.  You’ll .  You may need to do this in 2-3 batches.  Brown the meat – high heat, no stirring for a few minutes per side.  Set the cooked meat aside and do the next batch.  Add oil as necessary.

Add a little more oil to the pan if needed and onions until they just start carmelizing.  While they are cooking, use a wooden spoon to pull up all the baked-on fond, the bits of meat that carmelized to the pan.  Add in the garlic and cook for 30 sec.  Add in the ras el hanout and cook for another 30 sec.  Add in the saffron in water, cinnamon stick, tomatoes, chickpeas and apricots.  Stir well and bring to a simmer.

The onion-tomato-chickpea-apricot mixture in the crockpot before adding in the lamb

The onion-tomato-chickpea-apricot mixture in the crockpot before adding in the lamb

Put the whole mixture into the crockpot and add in the meat.  Stir to combine.  If you are doing this the night before, put it all in the fridge.  (It can be stored in whatever fits in your fridge, just get it in the crockpot before starting up again.  Put the crockpot on high until the whole mixture simmers (starting to bubble on the edges).  This should not take more than half and hour, if that.  Turn down to low and forget about it.  For at least 8 hours.  Ideally a good 12 hours.

Serve with herbed couscous (recipe below).

Ras el Hanout

1-1/4 tsp allspice
2 tsp ground nutmeg
20 threads of saffron, crumbled
1/2 T black pepper
1/2 T ground mace
1 tsp ground cinnamon
1/2 T ground cardamom
2 tsp ground ginger
2 tsp salt
1 tsp turmeric

Combine in an airtight container.

Herbed couscous

This is another winner from my Moroccan cooking class.  Couscous has to be one of the easiest foods to make.  This recipe jazzes it up to make it into a dish.  I do not always buy all the herbs and sometimes just sub out if I have other herbs on hand.  I check out what else I have in the fridge from other recipes and throw that in.   The onion, broth and lemon juice ensure no matter what else you do, it will be good.  If you do the full recipe, you are in for a really great treat!

1 medium onion, finely chopped
2 T olive oil, divided
1 garlic clove, minced
2 c beef broth (chicken works too)
1-10 oz box of couscous (1-1/2 c)
¾ tsp salt, to taste
½ c chopped Italian flat leaf parsley
½ c chopped basil
1/3 c chopped mint
1-2 T lemon juice

Heat 1 T of the olive oil in a medium-sized pot over medium heat.  Add the onion and let caramelize, stirring occasionally.  Add in garlic and cook for 30 sec.

Add in broth, raise the heat to high and bring to a boil.  Stir in the couscouse, cover and remove from heat.  Let stand for 5 minutes.

Fluff the couscous with a fork, stir in herbs, 1 T of lemon juice and 1 T olive oil.  Taste to make sure it has the right lemon/olive oil/salt/pepper that you like.  Serve nice and hot.
 

Magic Peach Cobbler

Standard

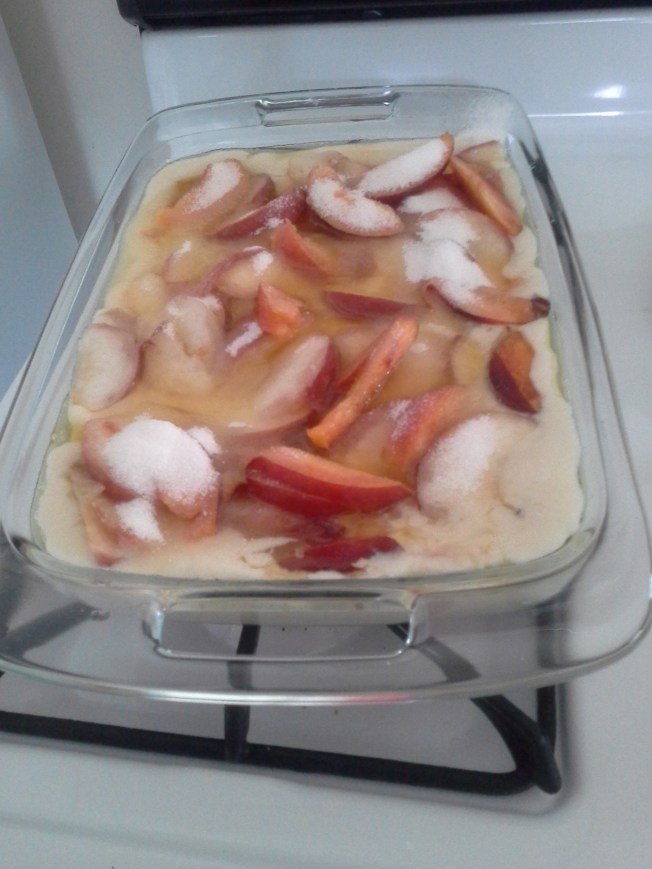
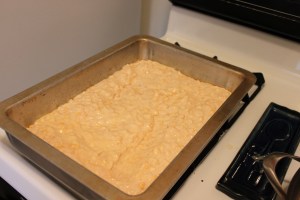
Before going in the oven.  The butter and the batter don't mix.  Then add the peaches and top with sugar.  I forgot to take a picture when it came out of the oven.

Before going in the oven. The butter and the batter don’t mix. Then add the peaches and top with sugar. I forgot to take a picture when it came out of the oven.

Peaches are IN SEASON!  Get them.  Get lots of them.  They are soo good!!!  And they don’t last, so you really have to move fast when they’re good.

Today’s recipe is from my mom.  It was written on a little piece of paper with very few instructions, like all good recipes should be.  Cobbler is a little misleading since there isn’t any brown sugar with flour/oatmeal concoction on the top.  So don’t get psyched for something like that.  This is more peaches in a baked bar/custard with carmelized sugar on top.  Delish!  I made a double recipe for tailgating a couple of weeks ago and even though I didn’t really cook it all the way through, it was still pretty popular.  Did I mention this is super easy?  There are so few ingredients that you’ll spend more time slicing up the peaches than anything else.
Doubling:  you can double this recipe easily.  Use a 13×9 to bake it in, but make sure you put down a rimmed sheet on the rack below the 13×9.  Once I put the whole thing in the oven, the butter heated up and spilled over the edge making for some smokey cooking around here lately.

Make ahead:  this is great to make ahead.  You can even reheat if you feel like it.  Store it in the fridge.


Magic Peach Cobbler

1 stick (1/2 c) butter
1 c sugar (split into 3/4 c and 1/4 c)
1 c flour
1-1/2 tsp baking powder
1/2 tsp salt
3 peaches, sliced (skins can stay on)

Preheat the oven to 350 degrees.  Put the butter in a 3-quart baking dish (9×9), put in the oven until melted, about 5 minutes.

Whisk together 3/4 c sugar and the rest of the dry ingredients.  Whisk in the milk.

Pour the batter into the butter.  DO NOT MIX.  Arrange the peaches on top of the batter.  Sprinkle the remaining 1/4 c sugar.  Bake for 35-40 min until the middle is set.


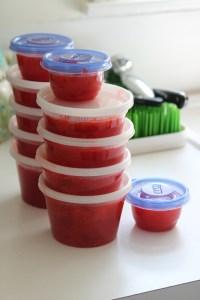
Freezer jam is easy and yummy!  Here is strawberry jam.  We already finished our peach jam from last year and I need to make more this year.  BTW, this is a double-recipe shown.

Freezer jam is easy and yummy! Here is strawberry jam. We already finished our peach jam from last year and I need to make more this year. BTW, this is a double-recipe shown.

More with peaches

If you are loving peaches and want to enjoy them all year long, pick up some pectin and small storage containers.  Don’t be fooled, the picture is of my strawberry jam, which is also super yum.

Follow the directions in the pectin for peach freezer jam.  It is fantastic!  Just water, sugar, peaches and pectin, you know there isn’t anything extra in there that you don’t want.   The directions are easy – boiling some water, cutting up from fruit, mixing everything together, then putting the jam into containers on your counter for 24 hours, then voila – jam!

There is nothing like pulling out a little bit of homemade jam in the middle of the winter to make you feel better.